Create these pink and white stamped flower nails
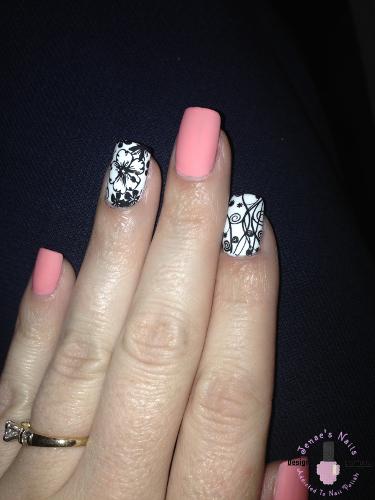
This is one design that takes only a few colors. I started off by applying 2 coats of OPI – Mod About You to my thumb middle and pinky fingers. Then for the index and ring finger I applied 2 coats of OPI – Alpine Snow.
After it dried, I applied the Konad Black to my chosen design from the Cheeky 2012 Plate. I cover about half of the design with polish so that way when I scrape across the design at about a 45 degree angle, it is enough polish to fill in the design but not too much that I’m just wasting product. I use an old plastic credit card to scrape. There are many scrapers out there that have different flexibilities and thicknesses. Find what works for you. I don’t recommend using metal scrapers as they can ruin your plates. Using my stamper, I picked up the image and rolled it onto my nail. Work quickly because the stamping polish dries quickly and won’t stick to your nail if you take too long. Any excess polish left on the stamper can be cleaned off with a lint roller or sticky tape. For the ring finger you can dab some Finger Paints – Black Expressionism to your work surface (I use a nail mat or a tile) and then use a dotting tool to make the polka dot pattern.
Products I used
Pink and White Stamped Flowers:
- Base Coat: Orly Bonder
- OPI: Alpine Snow
- OPI: Mod About You
- Finger Paints: Black Expressionism
- Konad: Black
- Top Coat: Seche Vite
- Cheeky 2012 Plate
- Dotting Tool
- Thumb, Middle, and Pinky fingers: 2 coats of OPI Mod About You.
- Index fingers: 2 coats of OPI Alpine Snow. Using Cheeky plate, stamped with Konad Black.
- Ring fingers: 2 coats of OPI Alpine Snow. Using dotting tool, make dots with Finger Paints Black Expressionism.
Want to get the latest updates from Jenae’s Nails ?
Subscribe below to be the first to know when new content is available.
[email-subscribers-form id=”1″]


